Configuring Certificate for Interception with BurpSuite: A Practical Guide
Intercepting HTTPS traffic is a core skill in modern web application penetration testing. If you can’t see what’s going on behind SSL/TLS encryption, you’re missing critical data that could expose security flaws. That’s where Burp Suite comes in, a powerful proxy tool trusted by Pentesters worldwide. But to unlock its full potential, especially when dealing with HTTPS, you need to correctly configure and trust Burp’s certificate. Skip this step, and you will hit certificate errors, broken pages, and blind spots in your testing.
In this practical guide, you’ll learn how to configure Burp Suite’s certificate. From exporting and installing the Burp Suite CA certificate to setting up your browser and fixing common issues, we will walk through everything step-by-step to ensure your setup is secure, efficient, and test-ready.
Why Do You Need a Certificate for HTTPS Interception?
Burp Suite works as a Man-in-the-Middle (MITM) proxy. When your browser visits an HTTPS website, Burp generates a fake SSL certificate for that domain. But browsers won’t trust this certificate unless you manually install Burp’s Certificate Authority (CA) certificate. Without this step, you’ll get certificate errors or blocked connections.
Step-by-Step Setup: Configuring Burp’s Certificate
Step 1: Launch Burp and Check Proxy Settings
- Open Burp Suite
- Go to Proxy → Options → Proxy Listeners
- Make sure it’s listening on 127.0.0.1:8080 (or whichever interface/port you plan to use)
This is the port your browser will send traffic through.

Step 2: Export the CA Certificate
Burp generates its own CA certificate for HTTPS interception.
- In Burp, go to Proxy → Intercept → Open Browser (this opens Burp’s built-in Chromium browser)
- Visit http://burpsuite (yes, HTTP)
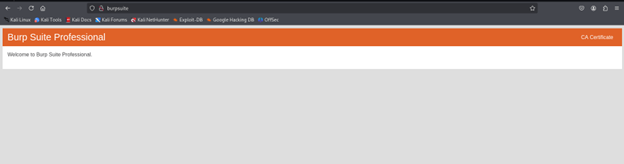
- Click “CA Certificate” to download the file (der)

Alternatively, you can download it via Proxy → Options → Import/export CA certificate.
Step 3: Install the Certificate (Depending on Your Platform)
Now install that certificate into your browser or operating system, depending on your setup.
For Firefox (uses its own certificate store)
- Go to Settings → Privacy & Security → Certificates → View Certificates
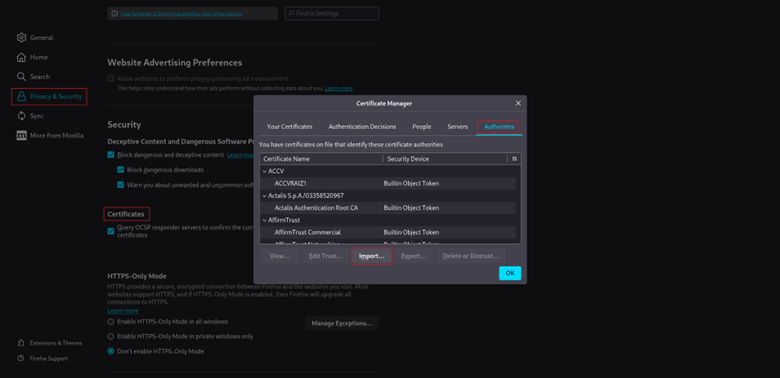
2. Under the Authorities tab, click Import
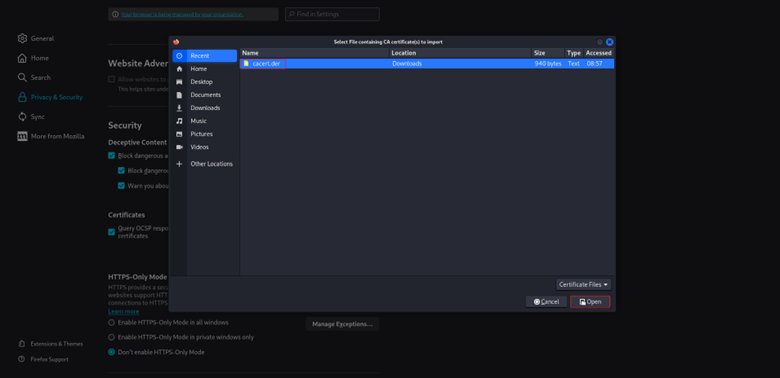
3. Select cacert.der and check “Trust this CA to identify websites”
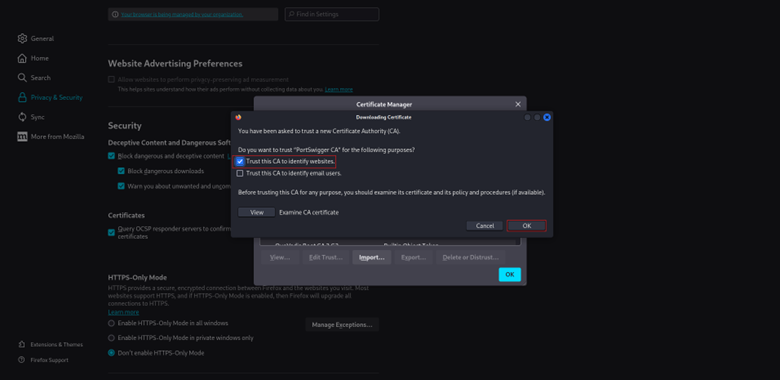
Firefox doesn’t use the OS trust store, so this step is mandatory if you are not using Burp’s browser.
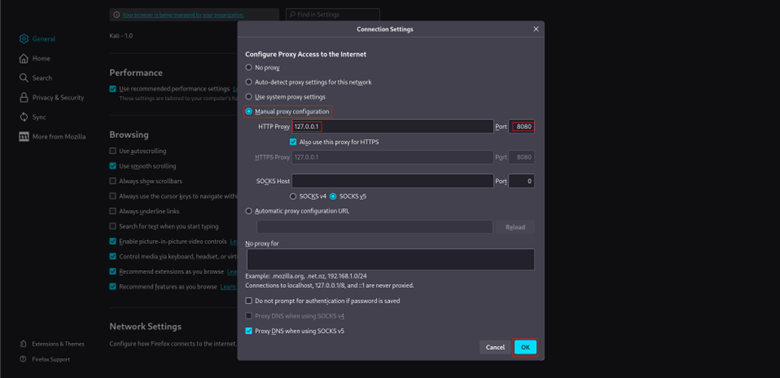
Step 4: Configure Your Browser Proxy Settings
If you are not using Burp’s embedded browser, you will need to route your traffic through Burp manually:
- Manual proxy setup:
Set your browser (or system-wide proxy) to:- Address: 127.0.0.1
- Port: 8080
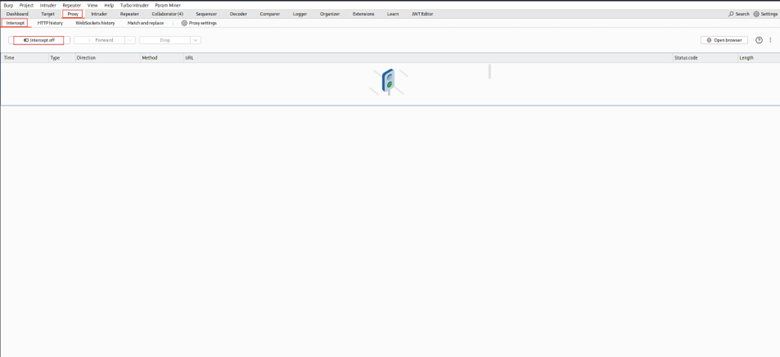
- No intercept yet:
Go to Proxy → Intercept in Burp and disable interception until you are ready, or your pages won’t load.
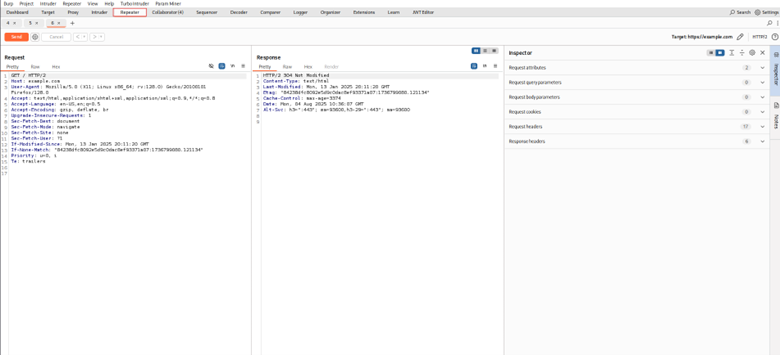
Step 5: Verify HTTPS Interception
Visit an HTTPS site like https://example.com. You should:
- See no certificate warnings
- Observe full request/response details in HTTP history
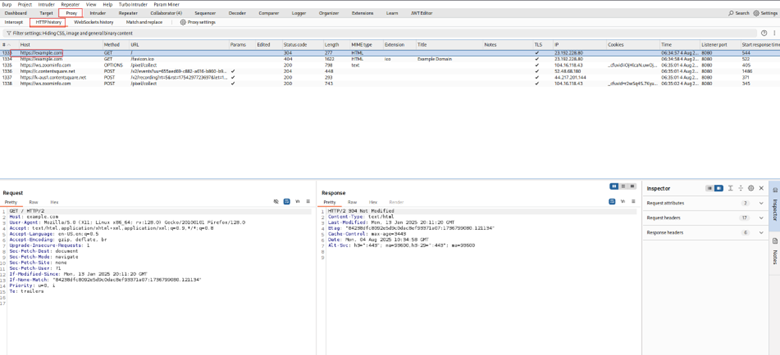
- Be able to modify or repeat requests as needed via repeater.
Troubleshooting Tips
- Still getting SSL errors?
Check if the certificate was installed in the correct trust store. - Testing mobile apps?
You will need to install the certificate on the device and set the proxy in the device’s Wi-Fi settings. - Getting blocked by Chrome?
Chrome enforces HSTS for many sites. You can use Firefox, Burp’s browser, or tools like mitmproxy as an alternative.
Important Note
Incorrect certificate setup leads to broken HTTPS interception, missed vulnerabilities, and false negatives. Always confirm your certificate is trusted by your browser or system before testing begins.
Explore other practical walkthroughs:
- Practical Guide: Intercepting HTTPS Traffic with Burp Suite
- Step-by-Step Guide for theHarvester Tool
- Steps for Effective DNS Footprinting
- The Ultimate Guide to SMTP and DNS Enumeration Practices
- Web Vulnerability Scanning with Nikto
- Mastering Network Discovery with Nmap: A Step-by-Step Guide
- What is Metasploit: A Practical Guide for Penetration Tester
- Shell GPT: A Practical Walkthrough
- Burp Suite: A Practical Walkthrough for Cybersecurity Enthusiasts
- Firewall Testing with Hping3: A Comprehensive Guide
- Session Hijacking Using Burp Suite
- Packet Sniffing with Snort: A Practical Guide
- Information Gathering using Spiderfoot: A Practical Walkthrough
AWAPT Training InfosecTrain Help
Want to master the art of intercepting encrypted web traffic like a pro? InfosecTrain’s Advanced Web Application Penetration Testing (AWAPT) Training equips you with real-world skills to intercept and inspect HTTPS traffic using Burp Suite. Through hands-on labs and expert-led sessions, you’ll learn how to properly configure certificates, set up your environment, and uncover vulnerabilities hidden within encrypted traffic, and critical skills required by any serious Web App Pentester.
