How to Create a Disk Image Using FTK Imager?
Digital forensics is booming. In fact, the global market for forensic tools is projected to grow from $12.94 billion in 2025 to $22.81 billion by 2030. As organizations scramble to investigate cyberattacks and data breaches, creating a reliable forensic image of a disk is crucial. A forensic disk image is an exact, bit-by-bit copy of a storage device, capturing every sector, file, folder, deleted item, and unallocated space. Investigators use these images so they can examine evidence without ever touching the original drive (preserving its integrity).

One of the most popular tools for this job is FTK Imager. FTK Imager is a free forensic utility designed to preview and copy drives without altering the source evidence. It can create “perfect” images (forensic snapshots) while computing hashes for integrity, so you can prove the copy has not been tampered with. In this guide, we’ll walk you through the process of using FTK Imager to create a disk image, step by step.
What is FTK Imager and Why Use It?
FTK Imager (Forensic Toolkit Imager) is a lightweight, open-source tool from AccessData. It was built specifically for digital forensics to acquire and examine evidence in a safe way. Its key promise: it copies data without altering the original. In practice, FTK Imager does things like:
- Create forensic images (exact copies) of hard drives, SSDs, USB drives, CDs/DVDs, or even individual folders and files.
- Preview files and folders on your drives or on existing images without modifying anything.
- Mount images for read-only access (you can browse an image as if it were a drive, exactly as the user saw it originally).
- Export files from inside an image (for example, to recover deleted files).
- Verify integrity by generating hash values (MD5/SHA1) for the image and comparing them with the original.
Because FTK Imager handles drives read-only and logs actions, it is trusted by law enforcement and investigators. It is freeware; just download and install it from AccessData’s site (for example, via FTK Imager 4.7.1 on Exterro’s page). Once installed, it is ready to capture and preserve evidence.
Why Create a Forensic Disk Image?
Before we get to the “how,” let’s clarify why we need a forensic image. A forensic disk image is more than a normal backup. It is an exact “snapshot” of the drive at one moment in time. This means every bit is copied, not just the visible files. It includes system areas (like the Master Boot Record), hidden partitions, and even deleted or slack-space data. This way, investigators can later recover anything that was on the drive (even if the user tried to delete it), without ever touching the original media.
Key reasons to use a forensic image:
- Integrity: You can verify that the copy matches the source. FTK Imager computes hashes (like MD5/SHA1) so you can prove in court that the image is identical to the original.
- Non-destructive: You work on the copy, never the original. That means the evidence drive remains untouched and court-admissible.
- Complete evidence: If new leads appear, you have the entire drive captured. You can always go back and look for something you missed.
- Efficiency: Imaging lets you analyze at your own pace, possibly on faster hardware, without keeping the suspect’s drive busy.
Now let’s see how to do it with FTK Imager.
Step-by-Step: Creating a Disk Image
1. Download and Install FTK Imager
Visit the AccessData (Exterro) website and download the latest FTK Imager installer (e.g., version 4.7.x). Run the installer on your forensic workstation. When it is done, launch FTK Imager (you can run it as an Administrator to ensure full access). You will see the FTK Imager dashboard or Window.
2. Prepare the Target Drive
Attach the drive you want to image to your computer. If it is a suspect’s hard drive, connect it via a write-blocker (so Windows can see the drive but cannot write to it). If it is a logical volume (like C: or a flash drive), just plug it in. Verify in Disk Management or wmic diskdrive list brief that your system recognizes the correct drive letter or PhysicalDrive number (so you do not image the wrong disk!).
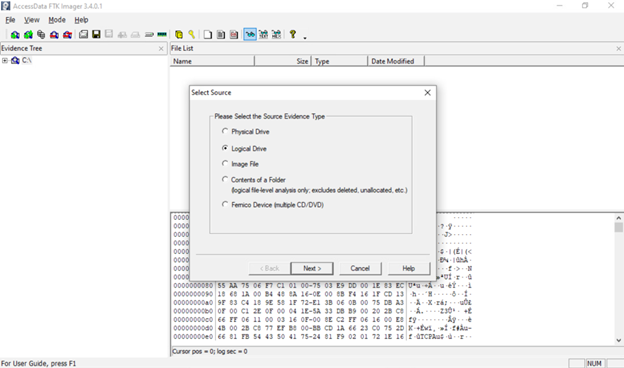
3. Choose the Evidence Source
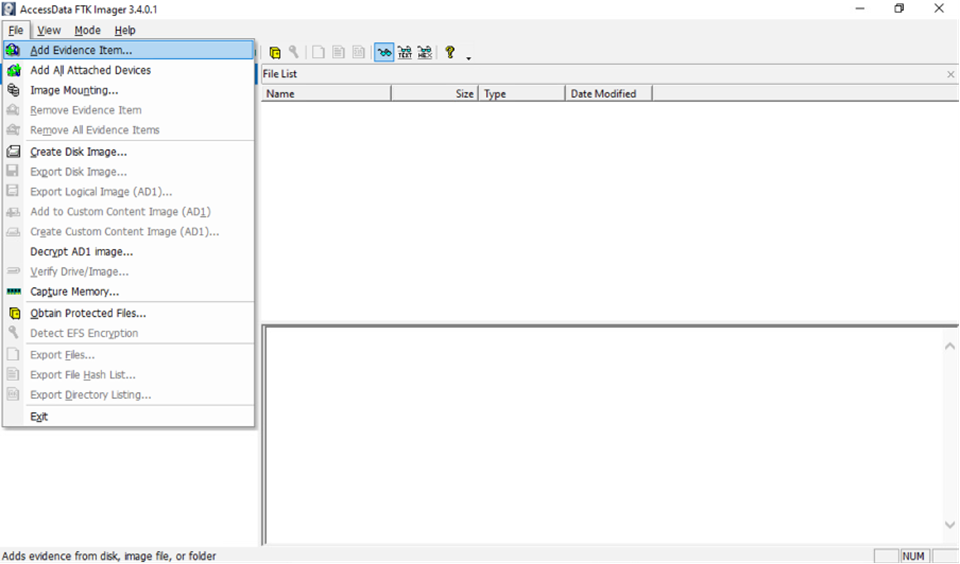
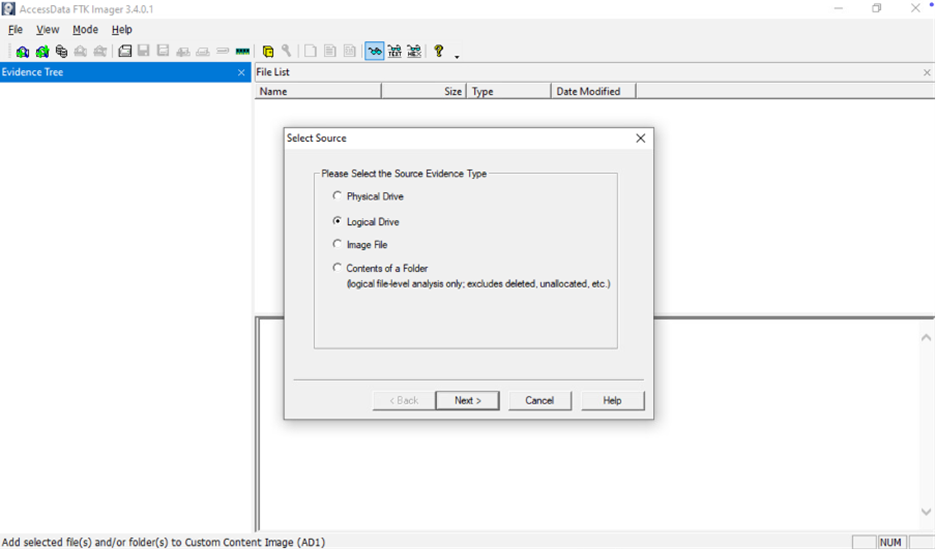
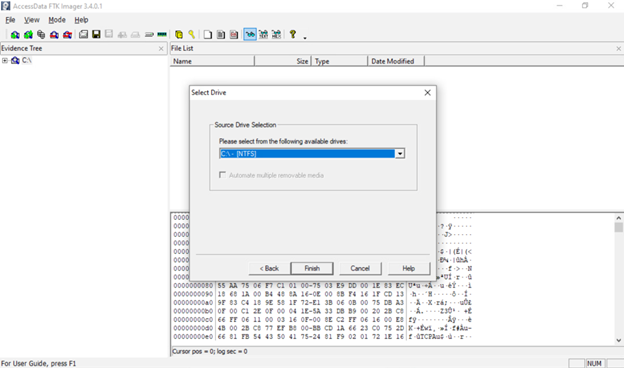
In FTK Imager’s menu bar, click File → Add Evidence Item. This opens a dialog to select the evidence source. In the pop-up, choose “Physical Drive” (to image an entire disk) or “Logical Drive” (to image just a volume like C:). Then pick the specific disk or partition from the list (for example, “PhysicalDrive1” or “Local Disk C:”).
OR
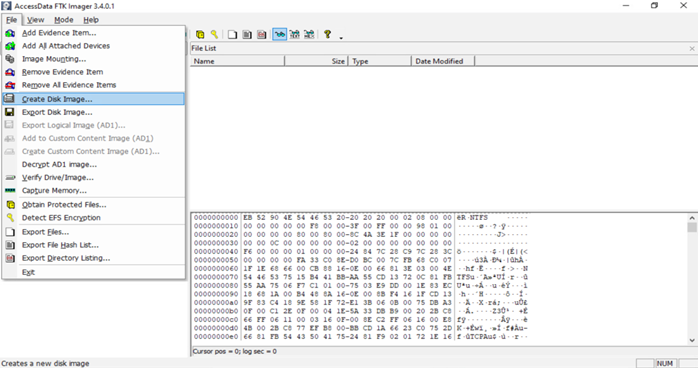
You can choose File → Create Disk Image from the menu if this option is available. Both paths work similarly: File→Create Disk Image will immediately jump to the imaging wizard, while File→Add Evidence → [select drive] requires an extra step to right-click and export (covered next).

4. Export the Image (Method 1: Create Disk Image)
If you choose File → Create Disk Image, FTK will guide you directly through the imaging wizard. Simply follow the prompts:
- After selecting Create Disk Image, pick Physical Drive or Logical Drive as above and click Next.
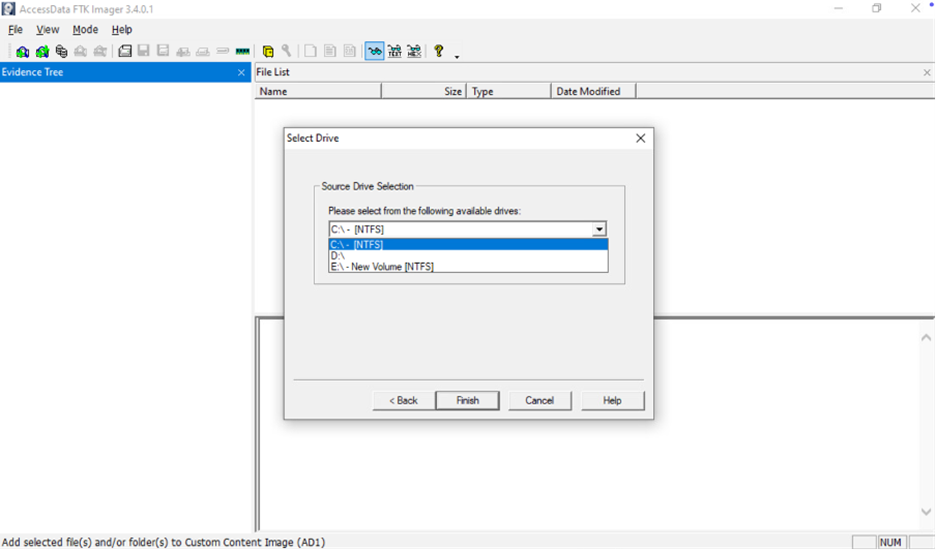
- Choose the specific drive/volume and click Finish or Next.
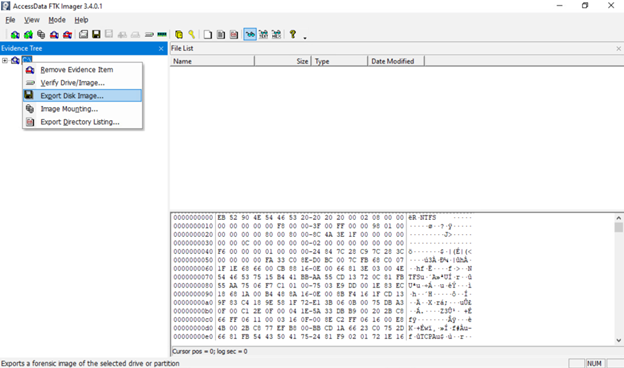
5. Export the Image (Method 2: Add Evidence & Export)
If instead you added the drive as an evidence item (File → Add Evidence Item), the drive will now appear in the FTK Imager Evidence Tree on the left. Right-click the drive entry and select ‘Export Disk Image‘. This also opens in the wizard; you will need to add a destination for the image. Click Add (or it may automatically prompt) to configure the image destination. Here you specify: the imaging wizard.
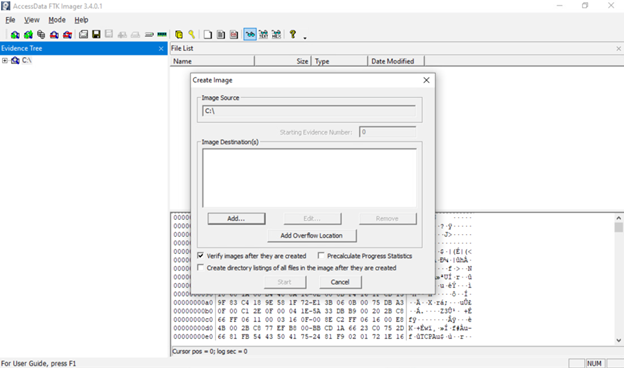
6. Select Image Destination
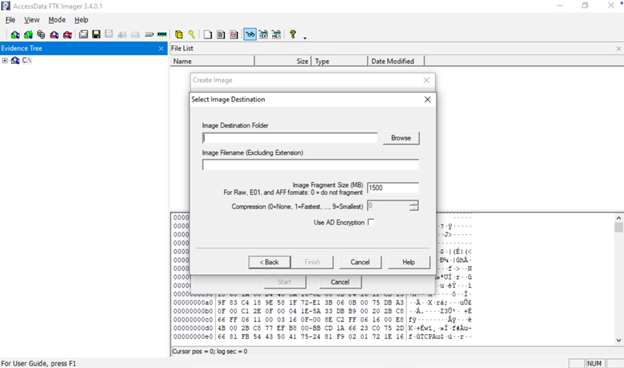
In the wizard, you will need to add a destination for the image. Click Add (or it may automatically prompt) to configure the image destination. Here you specify:
- Image Type/Format: Choose the format (see next section). For example, pick Raw (dd), E01, or AFF.
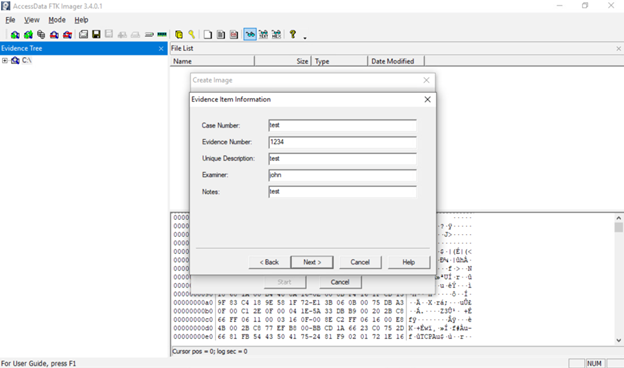
- Case/Evidence Info: You may be asked to fill in a case number, examiner name, notes, etc. This is optional metadata you can leave blank or fill (useful if the image is for a case file).
- Destination Path and Filename: Select the target drive/folder where the image file will be stored, and give the image a name (e.g., E01).
After adding this destination information, click Finish (or Next) to proceed to the final confirmation.

7. Start Imaging and Verify
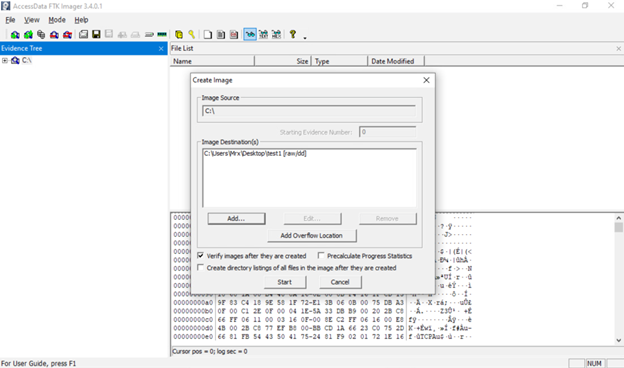
You should now see the imaging summary dialog. Before you hit Start, make sure the “Verify images” or similar checkbox is checked. This tells FTK Imager to compute hash values (MD5, SHA1) after the copy to verify integrity. Then click Start (or Begin). FTK Imager will begin copying the drive sector by sector.
8. Review Results
When done, FTK Imager will display a summary. It will show that the image was created, and it will list the MD5 and SHA-1 hashes. Save these hashes in your notes; they are your proof that the image is valid. If you saw any “bad sectors” messages, note those too. Otherwise, your forensic image is ready for analysis (for example, you can now load it into Autopsy or FTK Forensic Toolkit).
Tip: Make at least two copies of the image, stored on separate drives, if possible. And keep the original evidence drive safe (sealed in an evidence bag).
Choosing the Image Format
FTK Imager supports several forensic image formats. The most common ones are:
- Raw (DD): A simple bit-for-bit copy with no metadata. It is just a pure dump of all sectors (exactly like the Unix dd tool). It produces one large file. Many tools can read raw images, but there is no built-in compression or verification information.
- E01 (EnCase): The default Forensic Toolkit format. It creates a compressed image file (.E01) and includes case metadata. You can enter case number, examiner name, notes, etc, which get embedded. E01 files also support internal checksums. They can be large, but slightly smaller than raw, due to compression.
- AFF (Advanced Forensics Format): An open-source image format. It also supports metadata and compression. (Less common than E01, but recognized by many tools).
- SMART, AFM, etc.: Older or less-used formats (FTK Imager still lists SMART format from older Linux tools). In most cases, you will use Raw or E01.
Example FTK Imager CLI Command
For automation or scripting, FTK Imager has a command-line interface. For example, on Windows, you could run:
FTKImager.exe “\\.\PhysicalDrive0” “D:\ForensicImages\disk.E01” –e01
This tells FTK Imager to image the entire first physical drive (PhysicalDrive0) into an EnCase image file at D:\ForensicImages\disk.E01 (the –e01 switch specifies E01 format). You could also add –verify to have it compute hashes. (Always check Access Data’s docs for the exact syntax.) Using CLI can be handy if you want to script unattended acquisitions.
Advanced Cyber Threat Hunting and DFIR Training with InfosecTrain
Creating a forensic disk image with FTK Imager is straightforward once you know the steps. In summary: launch FTK Imager, select your source drive (physical or logical), add a new image destination, choose your format (e.g., E01 or raw), and hit Start with verification enabled. FTK Imager will do the heavy lifting, copying every bit and giving you hash values to prove it.
With practice, you will become swift at this. FTK Imager is like your digital camera for evidence; every click (Start) captures an exact snapshot of the scene. By following these steps and best practices, you will be imaging like a pro in no time.
Now, grab that suspect drive and start imaging; your investigation awaits! And if you are ready to take your digital forensics skills beyond the basics, InfoSecTrain’s Advanced Cyber Threat Hunting and DFIR Training is your next step. Master tools like FTK Imager, dive deep into real-world threat scenarios, and learn how professionals uncover and respond to advanced cyber threats.

Turn forensic imaging into an expert-level investigation.
Join InfoSecTrain’s DFIR Training Today and become the go-to Analyst your team can count on.
