Five essential tools for a Security Operation Center (SOC)
Cyberattacks are increasing at a rapid pace. The organizations are looking forward to building a Security Operation Center in which the SOC Team is responsible for detecting and monitoring security incidents. There is a lot of demand for SOC Analyst (L1) and Sr. SOC Analyst (L2) in the Security Operation Center. The SOC analysts monitor the company infrastructure 24/7 and respond to cyberattacks. Infosec Train offers a SOC analyst training program for L1, L2, and L3 SOC analysts. In this SOC training course, you will learn about devices, protocols, ports, services, and different types of SOC tools.
Some of the tools from the SOC tools list that you will learn in this SOC Analyst training program are given below:
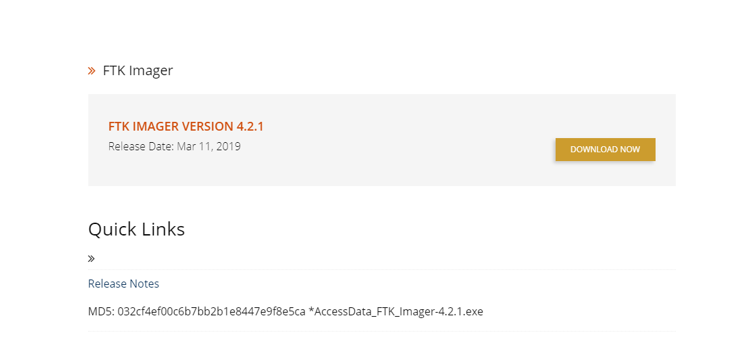
1) FTK : FTK stands for forensic toolkit. It is a data research and imaging tool used to acquire data forensically but creating copies of the data without performing any changes to the original evidence file. FTK imager’s features are producing forensic images of local hard drives, previewing the content of images stored on the local machine, and exporting files and folders from forensic files. The FTK imager also gives you the inbuilt checking function, which produces a hash report that helps check the hash of the Evidence before and after creating the image of the original Evidence. To download FTK imager is quite simple; you download FTK imager by clicking the following link:
https://accessdata.com/product-download/ftk-imager-version-4-2-1
By clicking on the above link, you will redirect to th e following page, and by click, on the download button, you can download it.
What are the advantages of FTK Imager?
- Faster, more efficient processing
- FTK delivers advanced memory and volatile analysis to aid
- forensic investigators and incident responders
- FTK is the only computer forensics solution to fully leverage
- Multithreaded, multi-core computers
- Through this toolkit, the recovery of passwords can be constructed
How to use FTK imager Tool?
Create a forensic image using FTK imager
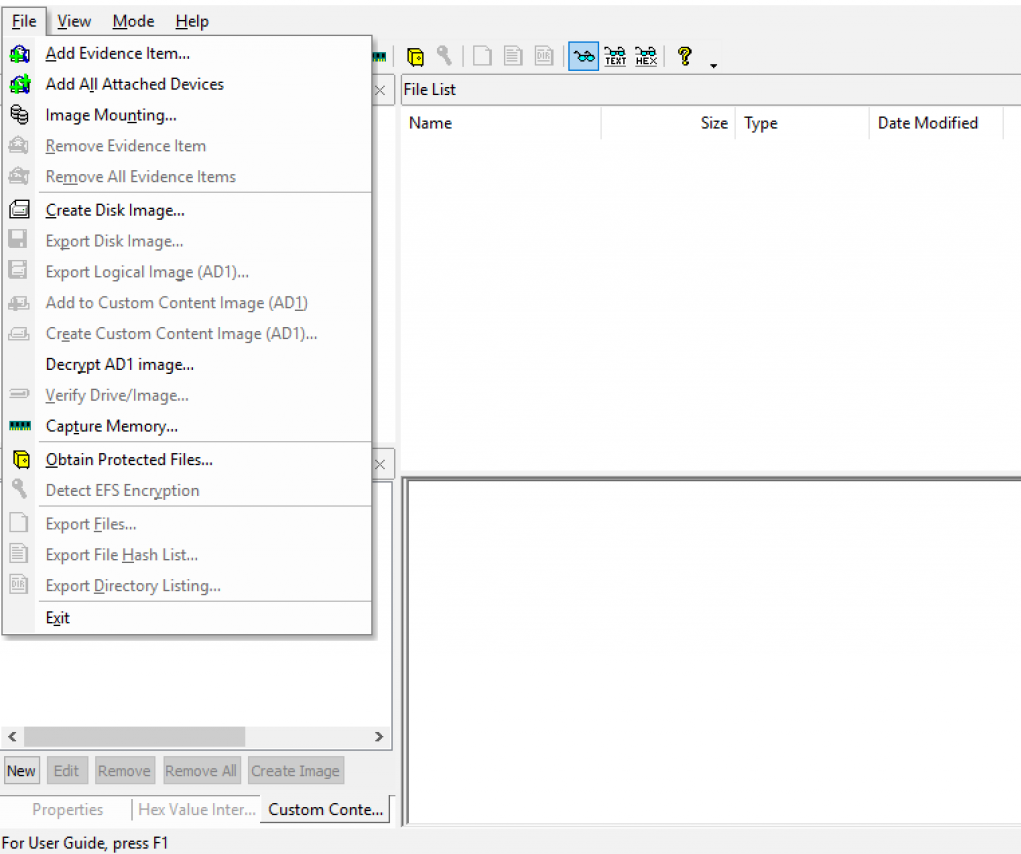
1) Click File, and then create a disk image, or click the button on the toolbar.
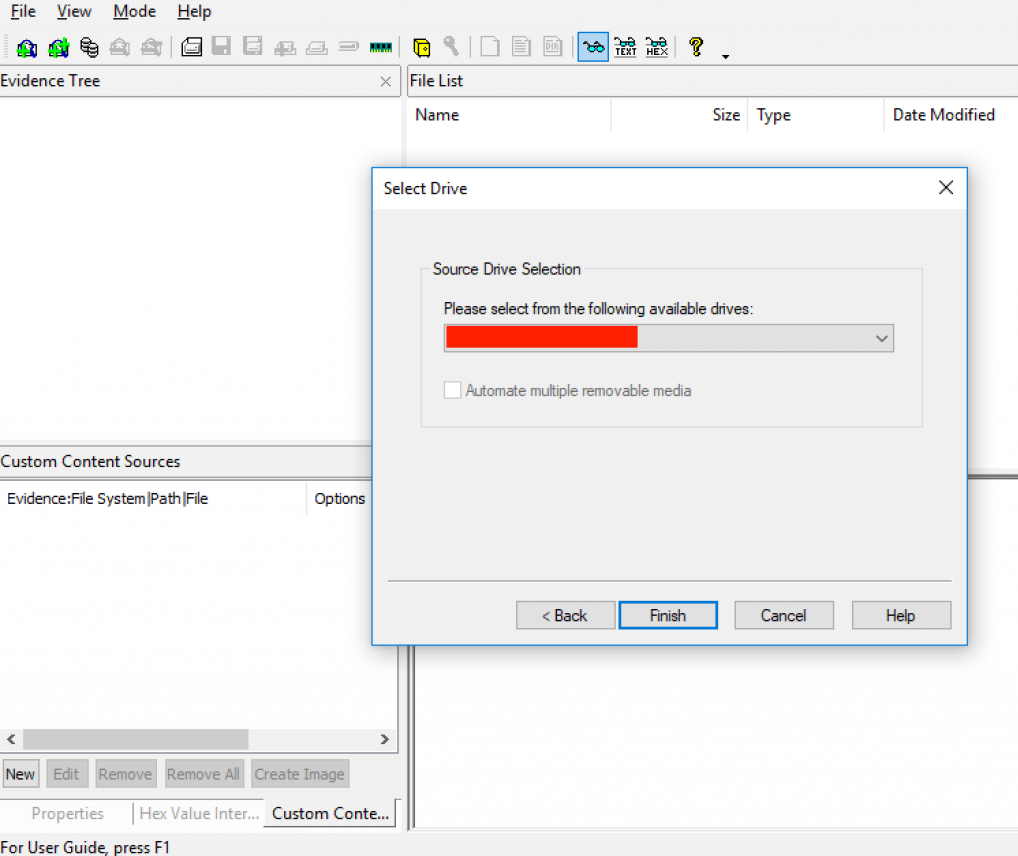
2) Select the source you want to make an image of and click Next.
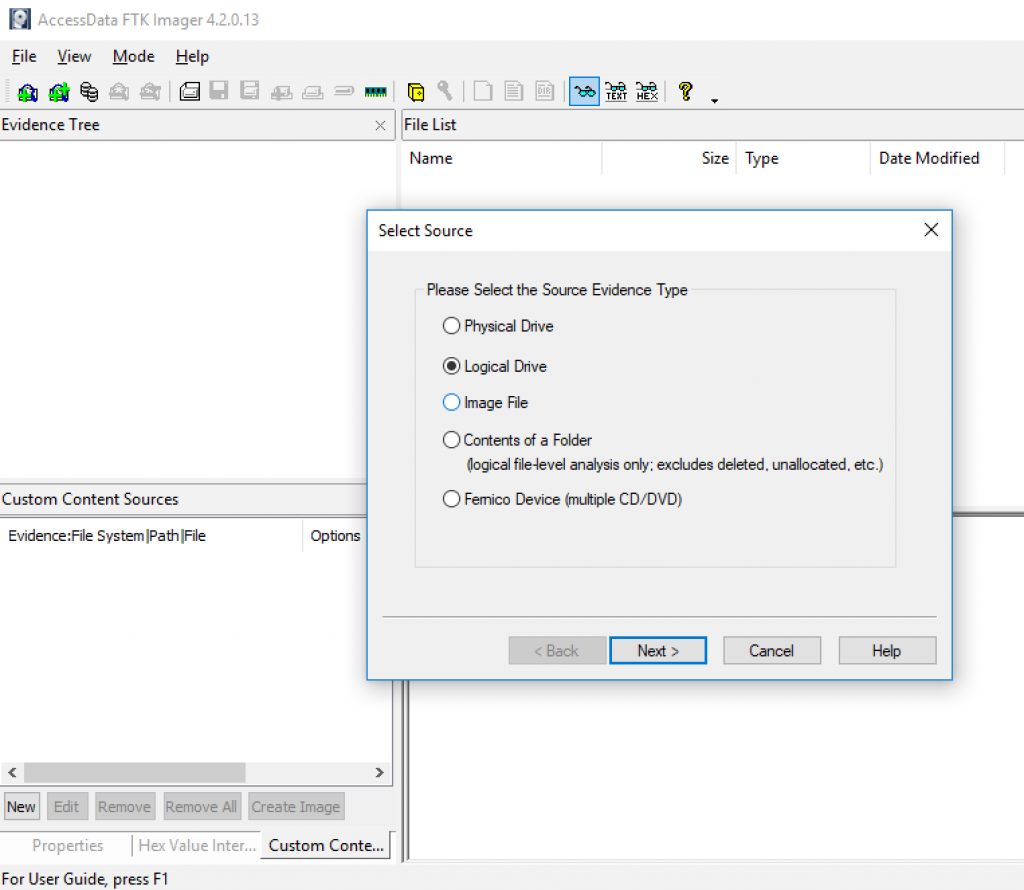
3) If you select a Logical drive to choose a CD as a source. Select the drive or browse to the source of the image you want and then finish.
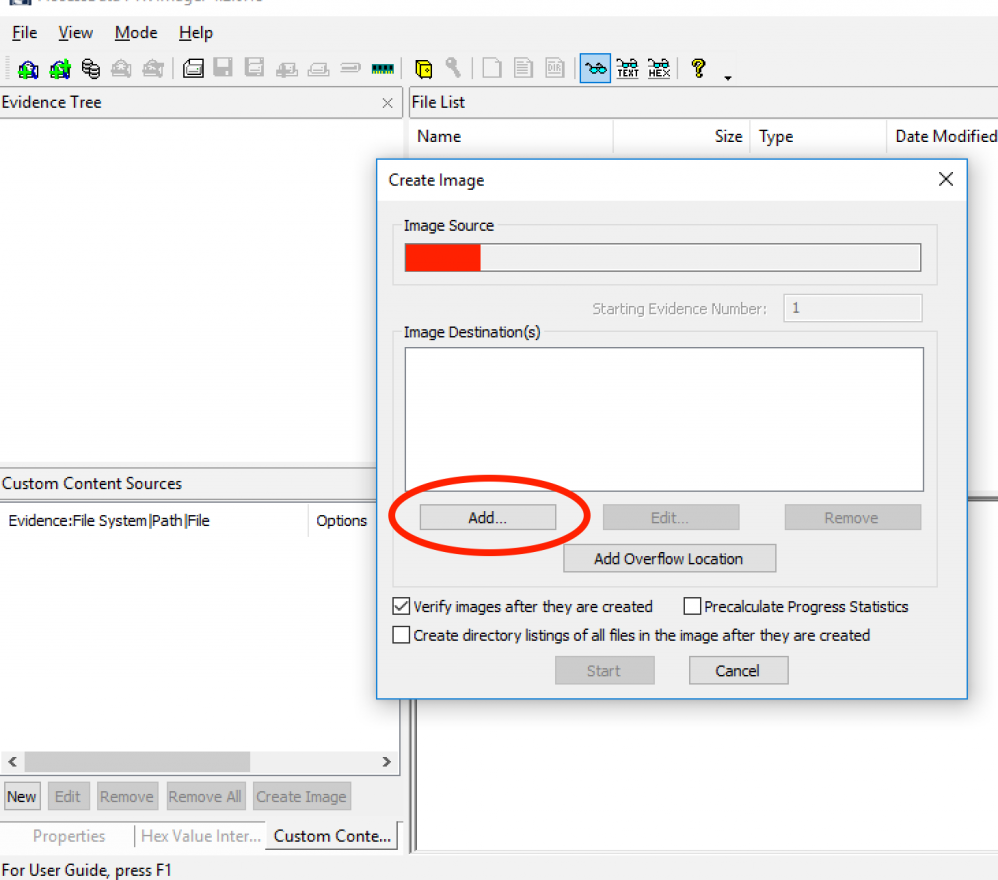
4) In the create image dialog, click add.
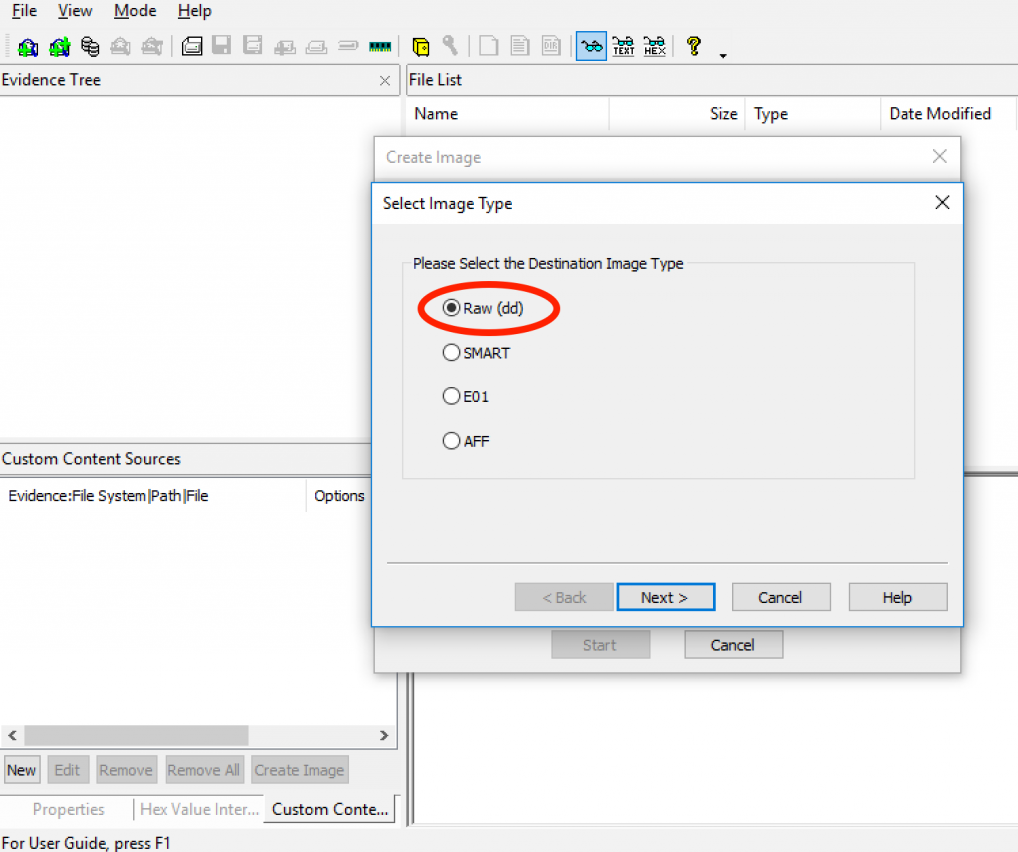
5) Select the type of image you want to create and proceed by clicking “Next.”
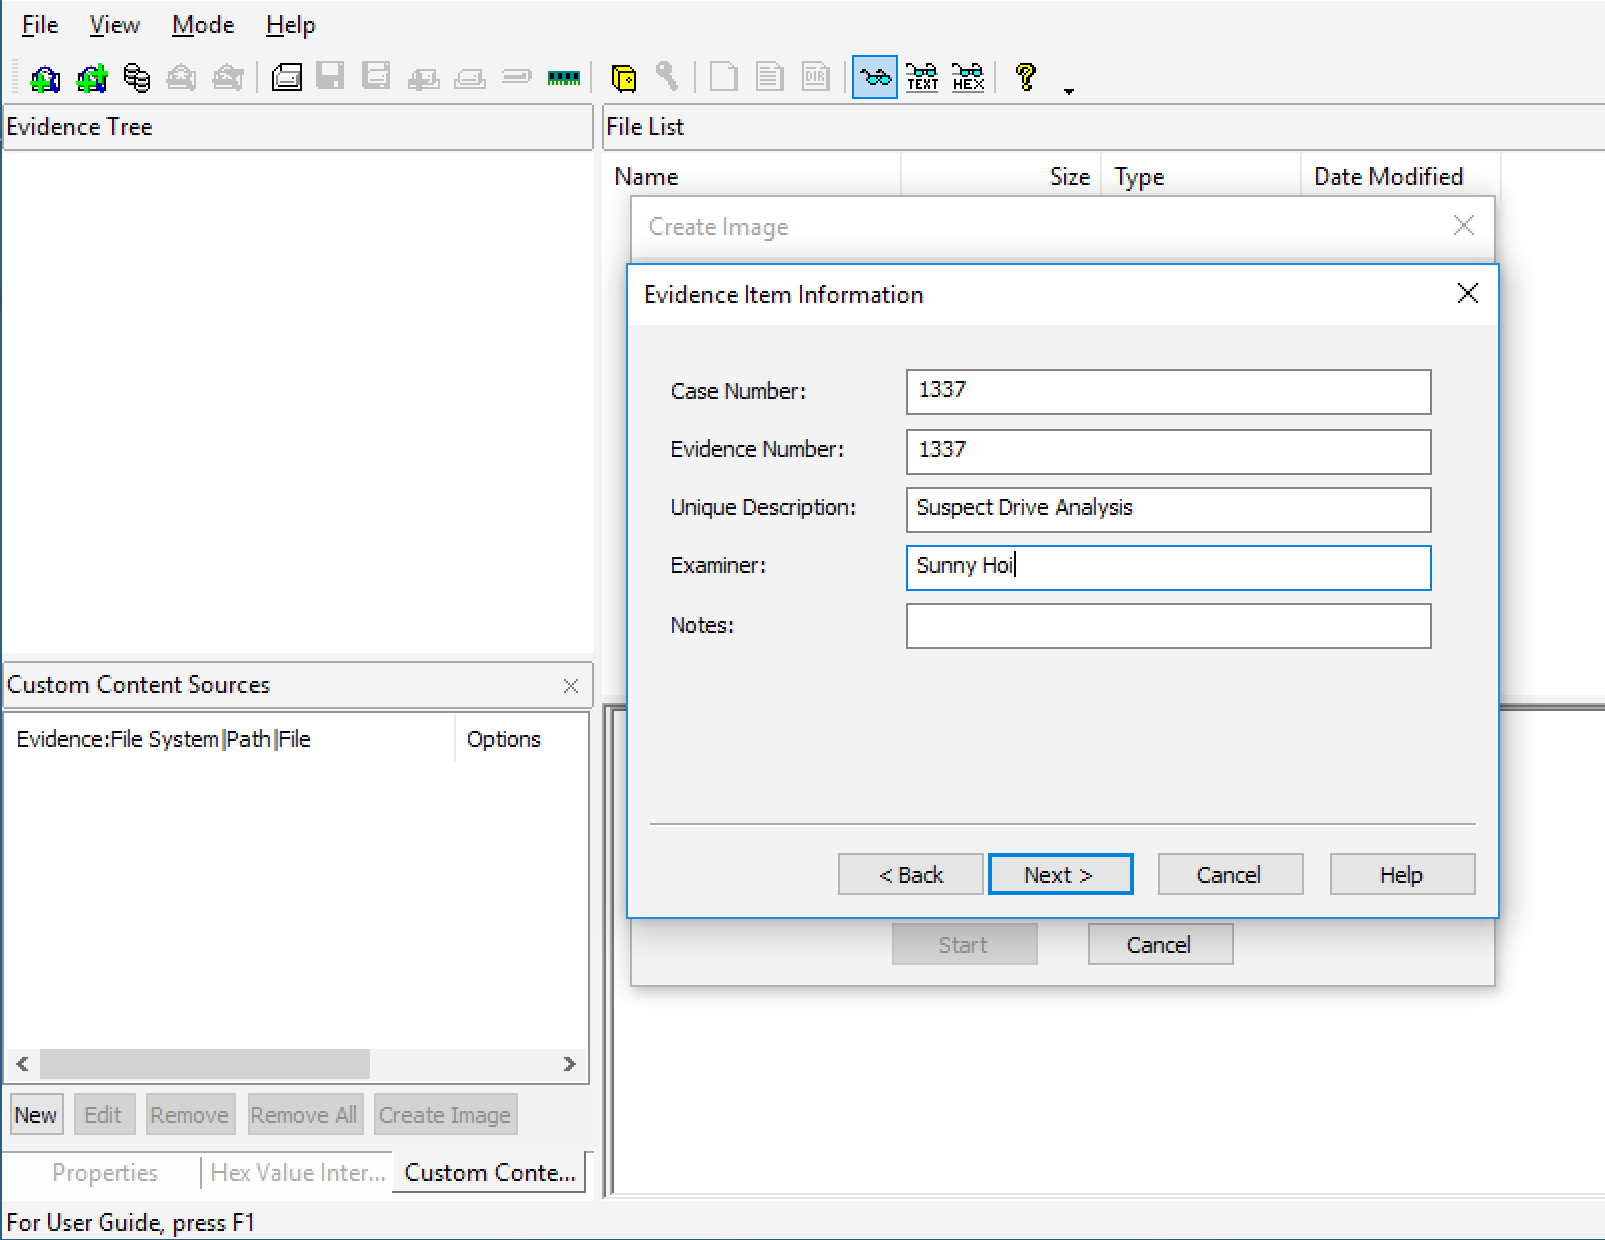
6) In “Evidence Item Information” Window, Enter Important Information Such As Case Number/Evidence Number & Examiner’s Full Name proceed by clicking “Next.”
7) In the image destination folder field, type the location path to save the image file or click the browser to find the desired location. When the “Image Fragment Size” of 1500 is used, the program will create a single 1-gigabyte file, which is evident as the drive being imaged is merely 1 gigabyte. When you are done, proceed by clicking “Finish.”
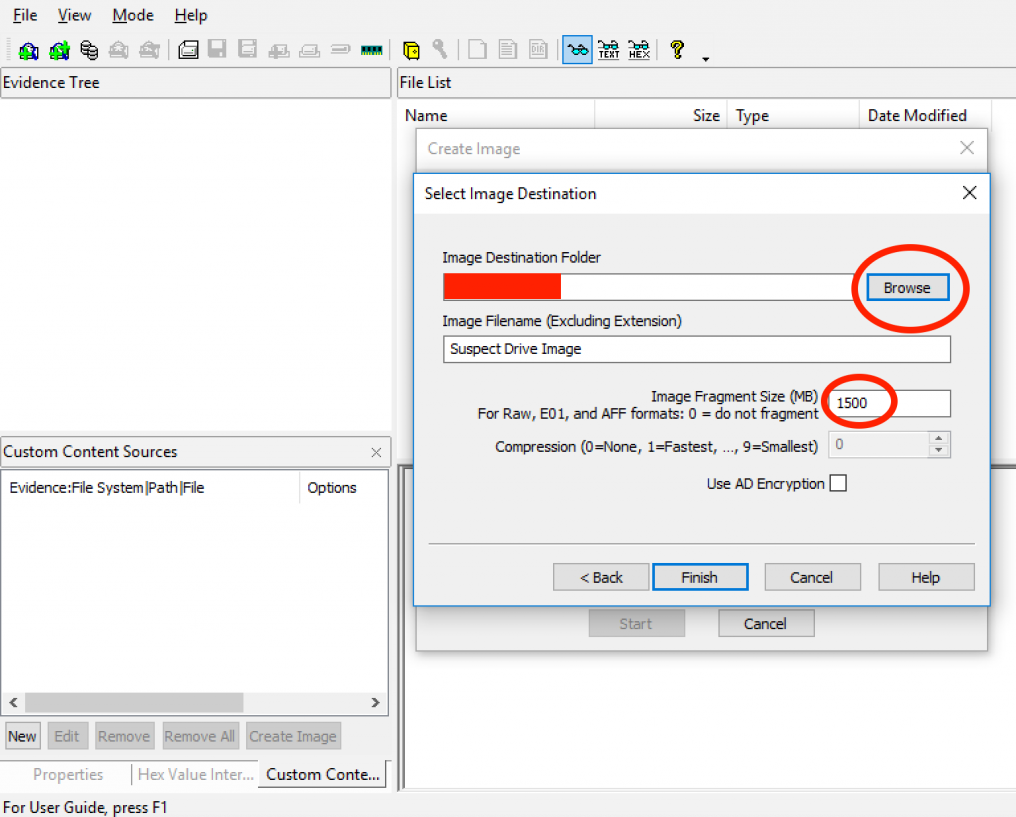
8) After click finish, you return to the create image dialog. Ensure that the option “Verify Images after they are created” is checked. This will all by itself establish a hash for the resulting image.”
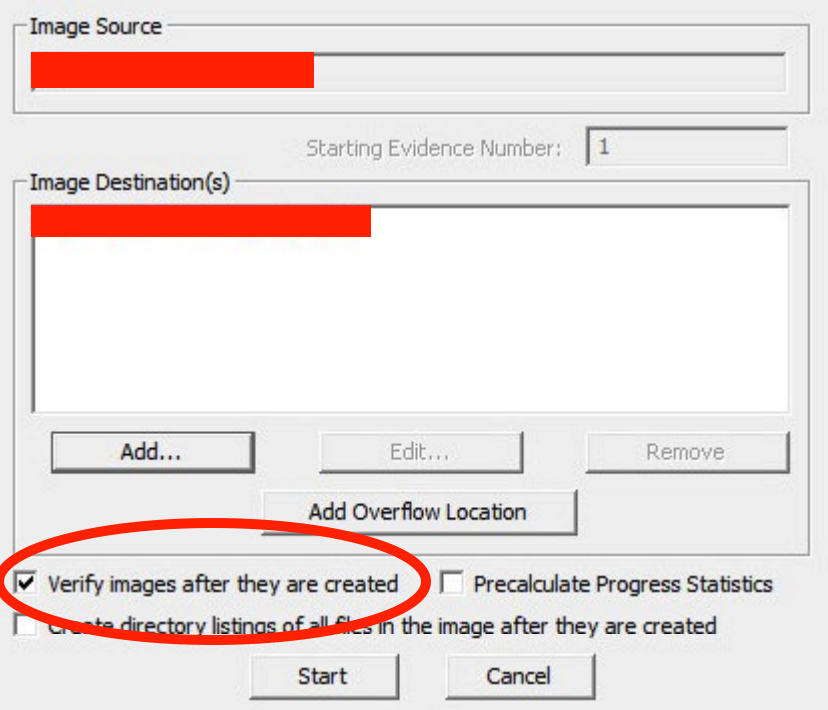
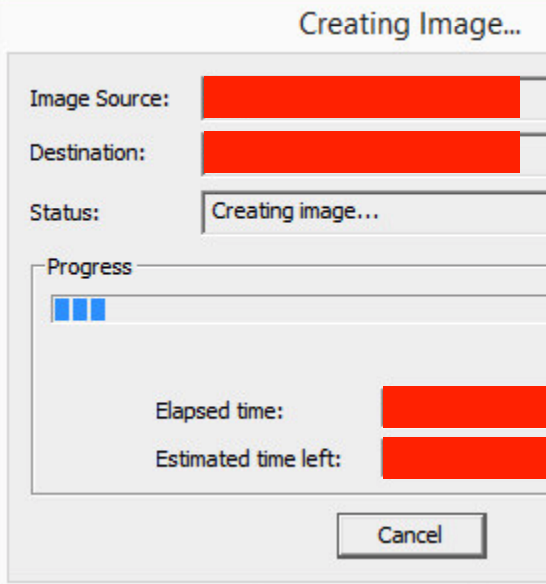
9) For creating our image file, click “Start.”
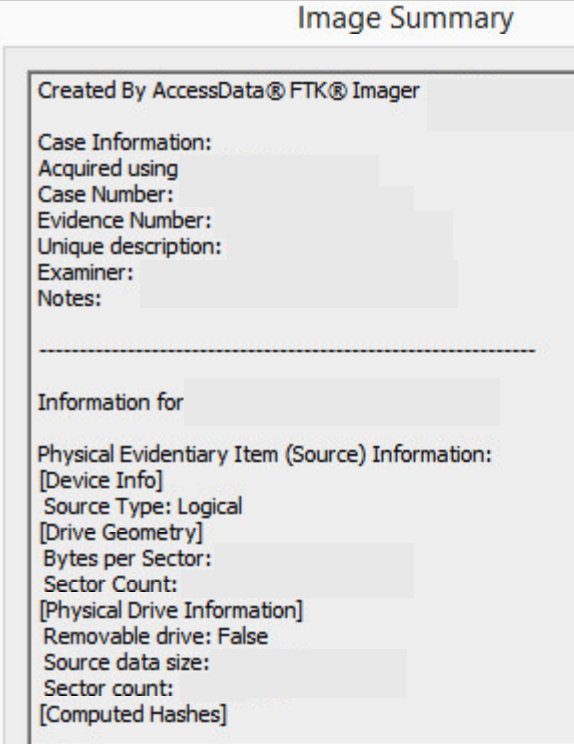
10) After the image was successfully created, click view image summary to view the detailed file information, including MD5 and SHA1 checksums.
2) Wireshark : Wireshark is a tool that analyses network packets. It was initially named Ethereal. It captures the packets flowing in the network and converts them into a readable form. Wireshark provides the features like color coding, filters, and many more that let us dig deep till roots and inspect the packets individually. It is an open-source tool used for protocol development and learning. The primary purpose is to make people aware of how packets of the network are extracted and analyzed from the machine’s runtime state and the difficulties and complexities. It is a fantastic platform to explore and learn about the analysis.
Wireshark Tool is generally operated on Windows. Network files can be found with an extension (.pcap, .pcapng). These are the data files that contain packet data of a network.
How to use Wireshark Tool?
Here, we’ll be discussing the tool overview, which includes how to download the tool, capturing packets, applying filters, and analyzing the packets.
Capturing the packets
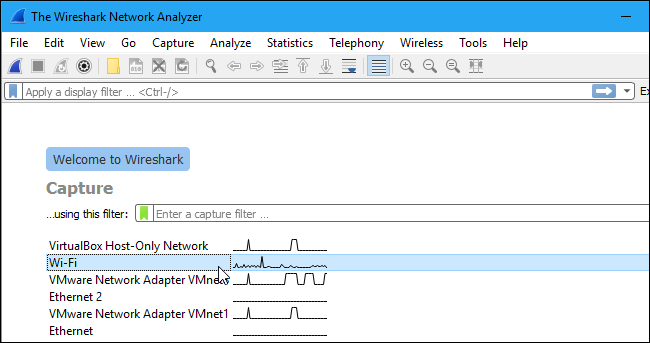
1) First, download the Wireshark tool, for windows, from its official website, while in Linux, we can get it in its packet repository.
2) After we have downloaded and installed Wireshark, we need to launch it and select the name of a network interface under Capture to begin capturing the packets.
3) After clicking the interface name, the packets begin to get captured. In Wireshark, every packet is captured, sent, and received by the system by default, whether it is addressed to the network adapter.
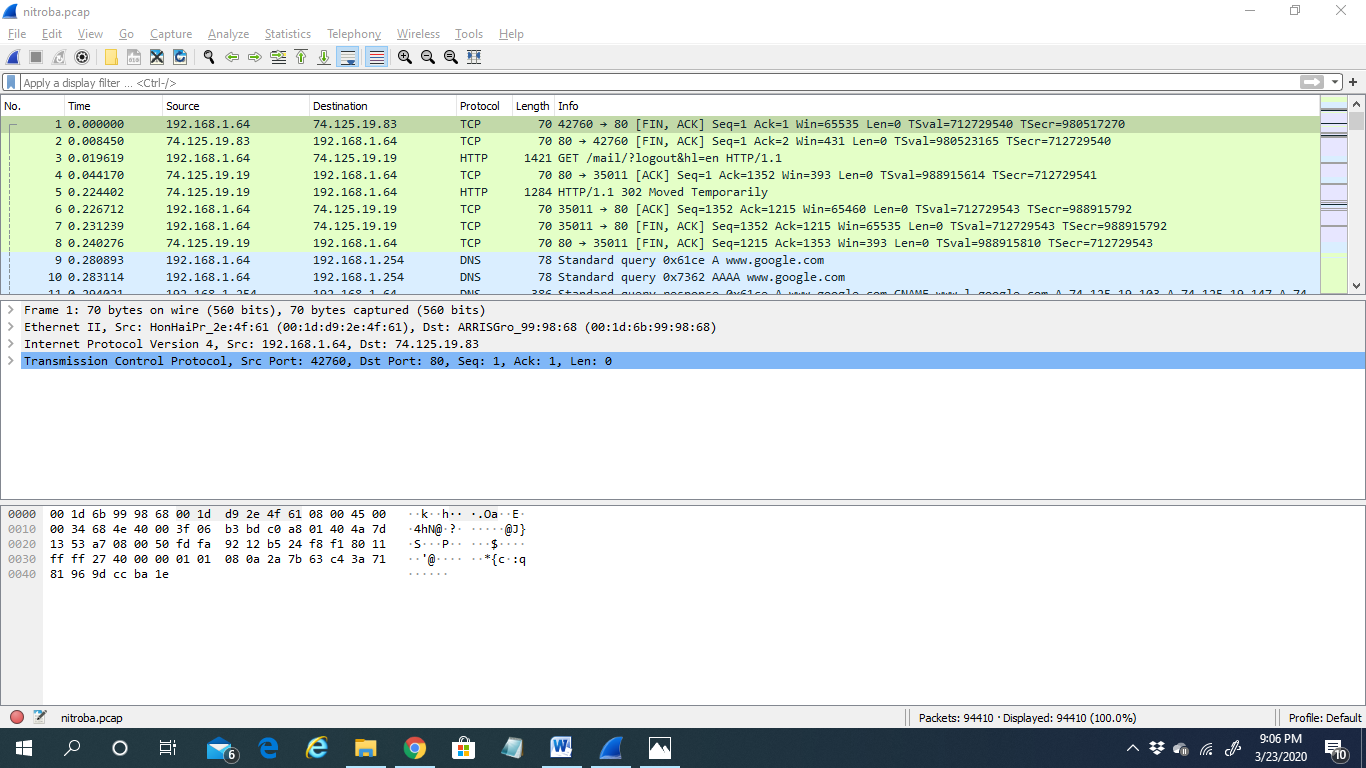
4) If we’re capturing live packets and then stopping the tool from capturing packets, we need to press the RED STOP button, the second button in the top left, to stop.
Filtering the packets
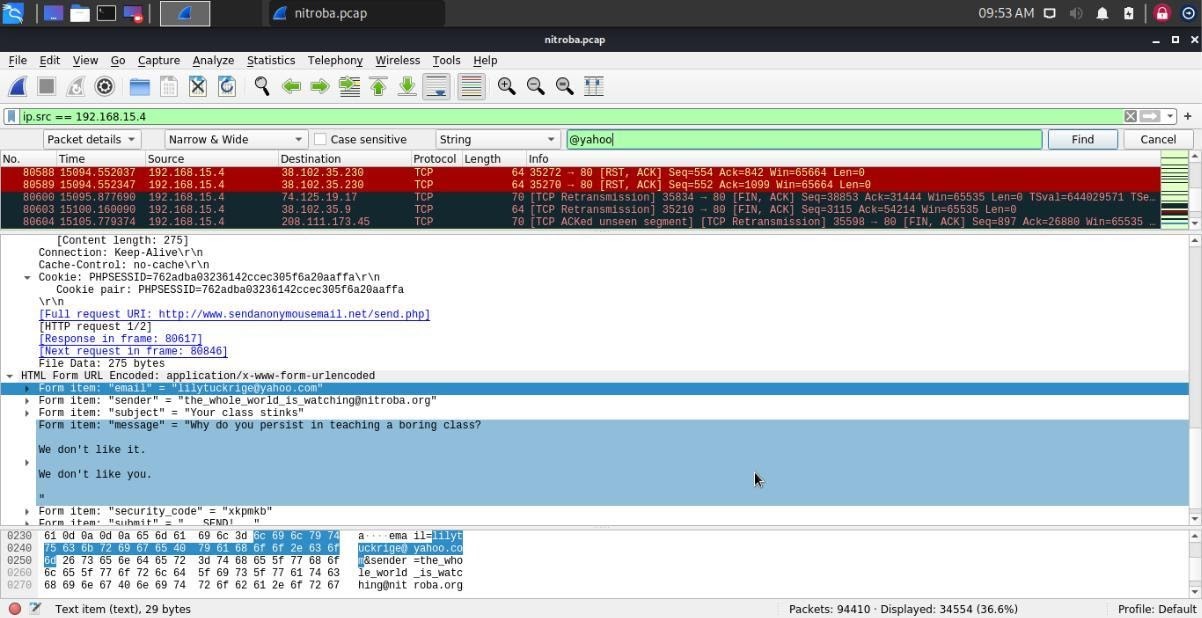
1) If we want to analyze something specific, such as analyzing the packets from an email id ending with @yahoo, all the other applications using the network are shut to narrow down the traffic. Here the filter comes into use.
2) We have to type the filter name into the filter box and then click “Apply.”
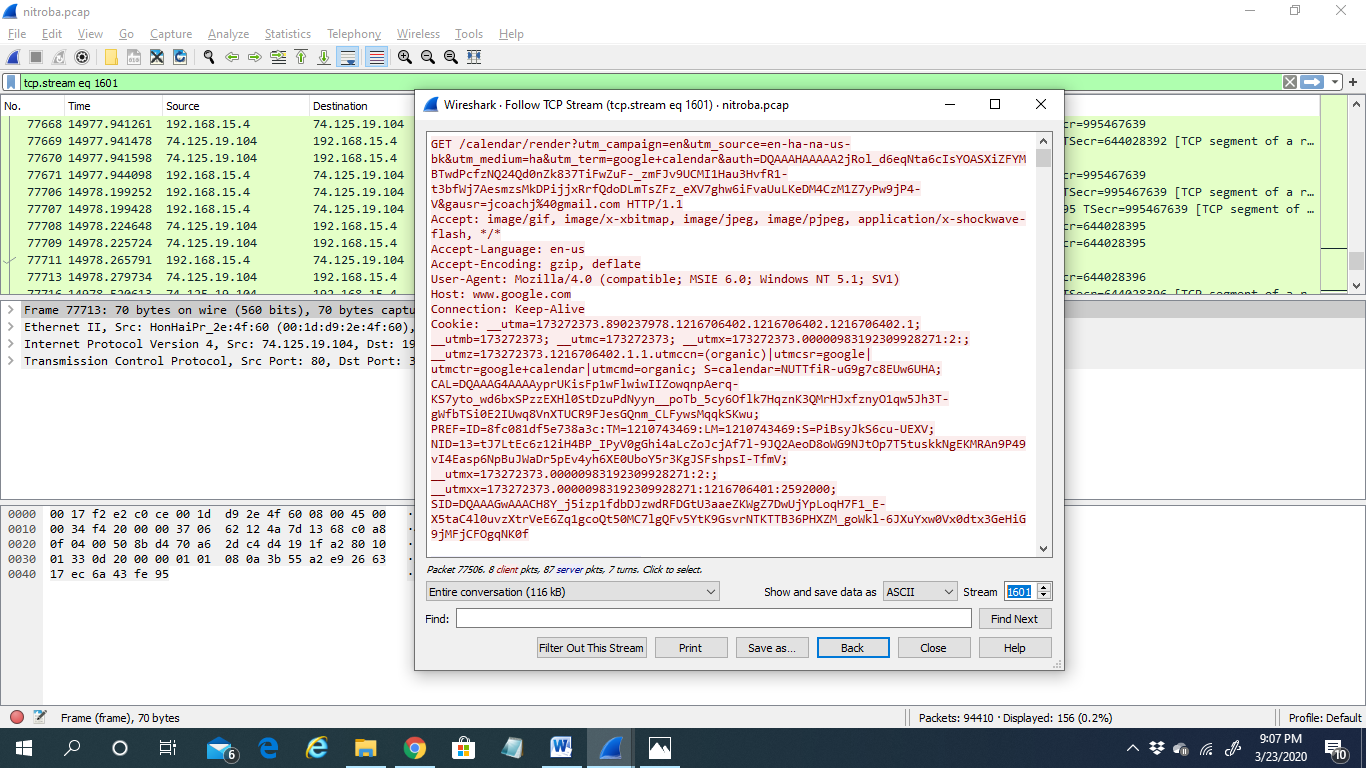
3) If we right-click a packet and select Follow>TCP Stream, we can see the client and the server’s full communication.
Analyzing the packets
1) We need to select a packet to dig down deep and look into its details. Here comes the most important part as in this step, we can find out about the culprit.
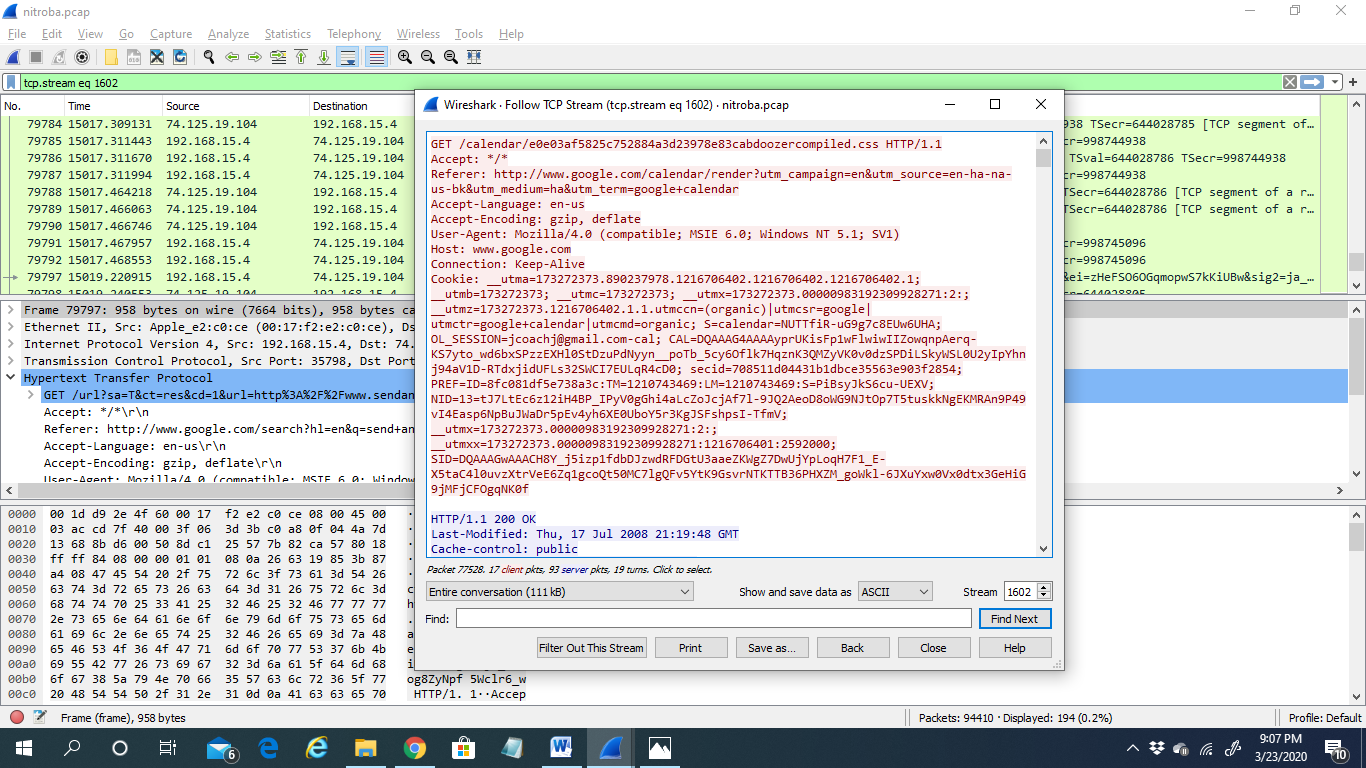
2) Analyzing a packet is a thread-in-pin task. It has to be done with sheer patience and care.
3) Network Miner: A network miner is a network forensic analysis tool mostly used by windows and supports other operating systems like Linux, Mac OS, etc. It is an open-source tool. Network miner is a passive network sniffer or capturing tool to detect operating systems versions, hostnames, open ports, etc. The advantage of using a network miner is that it does its work without putting any traffic on the network. This tool can also pass pcap files for offline analysis and regenerate or reassemble the transmitted files and certificate from pcap files. This tool gives information about mostly or centric rather than being a network as a whole; this information helps collect evidence for a forensic investigation. This tool has the feature of live sniffing; this feature allows us to capture packets over the network but is limited due to the buffer size. It can pass pcap files very quickly at a rate of 0.581 MB/sec. It can also perform OS fingerprinting, which is very necessary for any forensic investigation. You can download the tool from its official website.
How to use the Network Miner tool:
Here are the steps to running Network Miner for it to analyze network traffic:
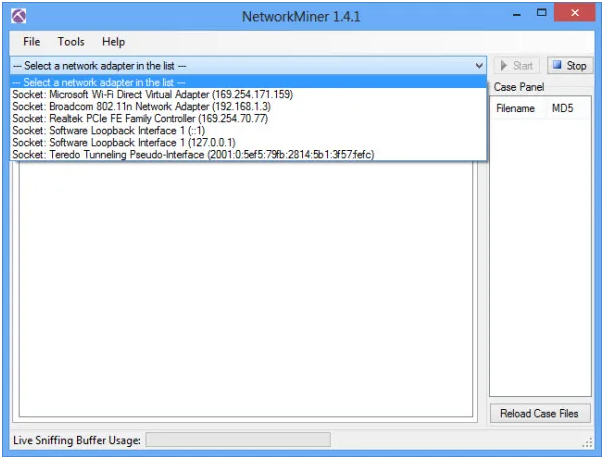
1) After downloading, you will need to run NetworkMiner.exe for installation. Then start the Network Miner tool and select the network interface for which the data has to be captured.
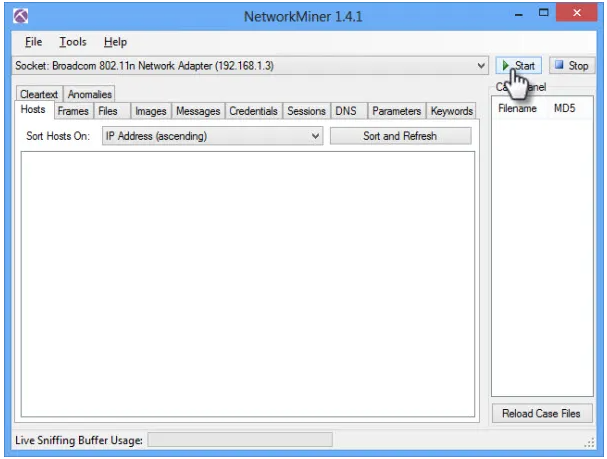
2) Click on the start option to start the sniffing process.
Analyze data in Network Miner:
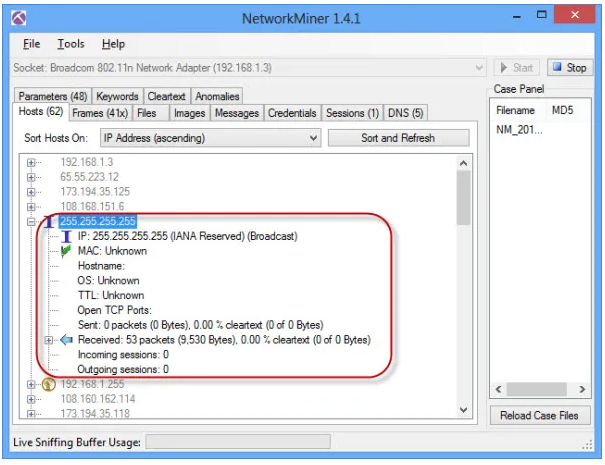
On the Hosts option, you can see a list of hosts connected to the network. You can extend any host to see the information like its MAC address, hostname, Operating System, TTL, Open ports, packets sent, received, etc.
4) Maltego: Maltego is an essential tool that is used to gather information on a large scale. Maltego can get a lot of information from a target or a variety of targets, whether your target may be a domain, IP address, server, etc. It automates the process and allows you to display the information in a way that can be understood. Maltego is based on publicly available information, but you need to ensure that you still perform your information-gathering within the scope you have provided. Maltego is pre-installed on kali-Linux and can be found under the information gathering section. Maltego has various versions where you have the community edition and professional edition. The community edition works perfectly for standard penetration testing. If you are going to use Maltego for information gathering on a large scale in an enterprise environment, I recommend the professional edition.
How to Use Maltego in kali-Linux:
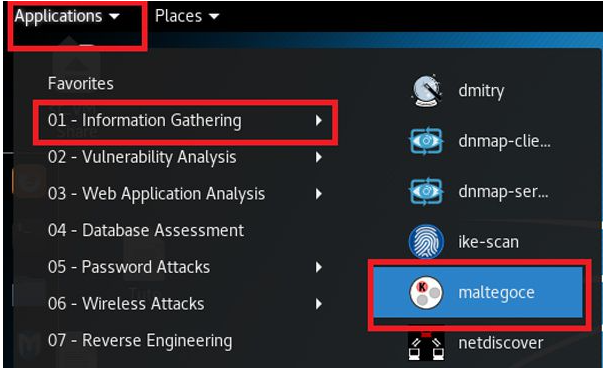
1) Maltego is available in Kali Linux by default. You can run by Application > Information Gathering > Maltegoce
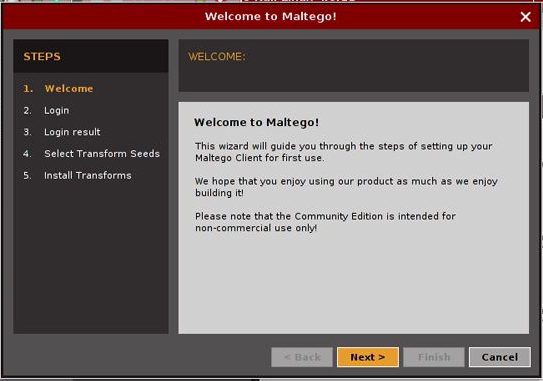
2) Welcome screen will be open
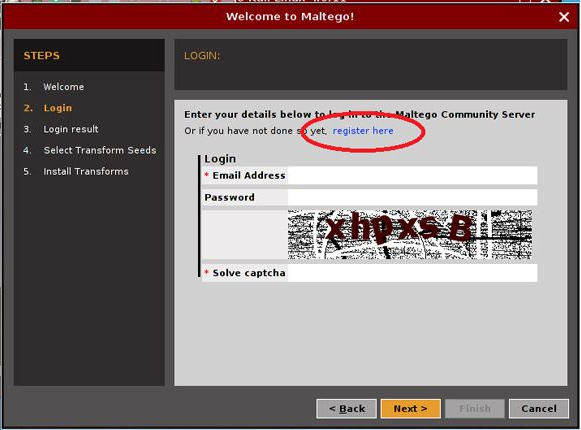
3) When you open up Maltego first time, you need to create an account from Maltego. It will encourage you to register so you can create your account from there.
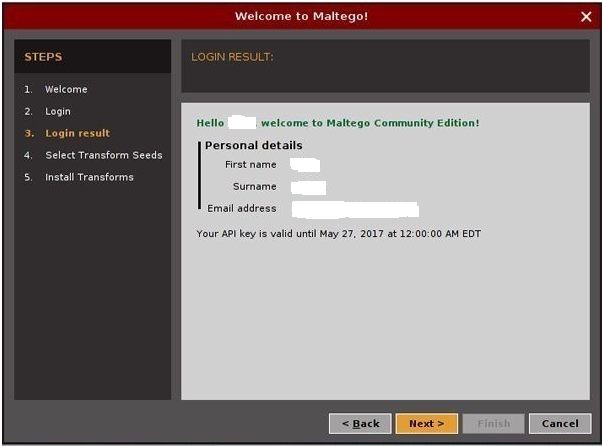
4) If you have provided the right information, your login result appear something like this:
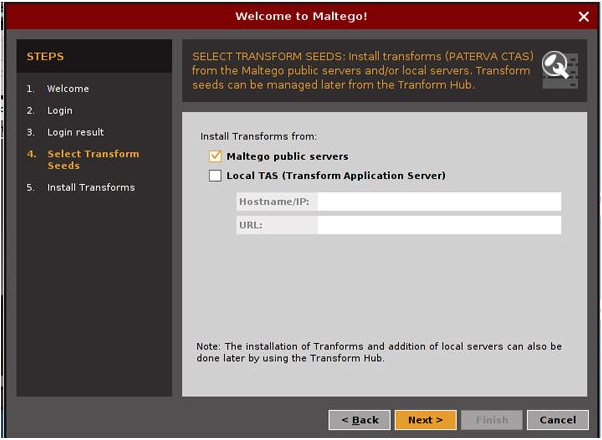
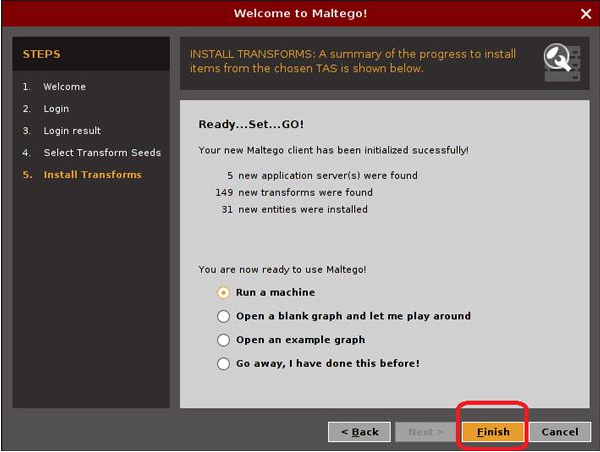
5) After the login process. You need to select the transformed seed. After the successful transform installation, you will be ready to run the machine for information gathering.
6) Select Run a Machine and click finish.
5) Splunk : Splunk platform is used to search, analyze, and visualize machine data from websites, applications, sensors, IoT devices, computers, etc. Splunk collects, monitors, and visualizes data in real-time. Splunk can do remote forwarding of data and let you visualize and get real insights; it makes your job a lot easy. It does real-time Syslog analysis. You can install Splunk on any server and can perform monitoring and understand what the IP traffic is and how many people are there on your website, and what actions they are trying to perform. Offering from Splunk is:
- Splunk enterprise: It collects, indexes, search, and visualizes machine data gathered from various resources.
- Splunk cloud: It delivers all the features of the Splunk enterprise as a cloud-based service. Provide access to Splunk enterprise security, Splunk IT Service Intelligence, and enable the Splunk ecosystem to work under the hybrid cloud model.
- Splunk light: It is a complete resolution for small IT environments to automate log search and analysis. Splunk light promotes tactical troubleshooting by gathering all of your data into one place in real-time and giving a powerful search and analytical language for real-time analysis.
Essential Components of Splunk:
- Search head(SH): It handles search management functions, direction search requests to a set of search peers(IDX), and then merging the result back to the user.
- Indexers(IDX): The index is a repository for Splunk enterprise data. Splunk enterprise transforms incoming data into events, which it stores in indexers.
- UF/HF: It connects and forwards the remote data to IDX, and it can also be enabled to parse the data.
How to set up a Website Monitoring App in Splunk:
1) First, download and install Splunk enterprise, then start and click on the Apps manager; it will list all visible and not visible apps.
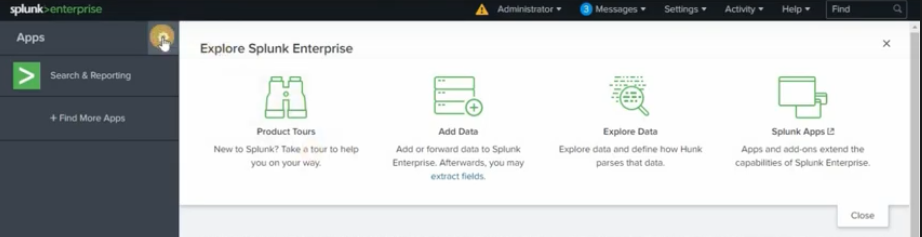
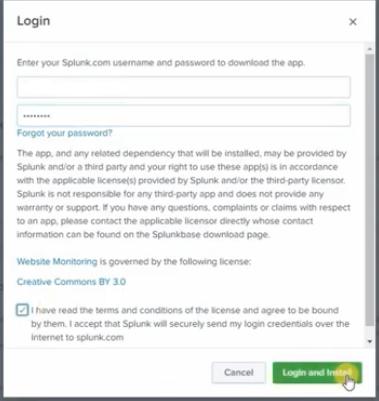
2) In the top right corner, you will find options to browse apps. Click on Browse apps for website monitoring app and login with Splunk account to install the app.

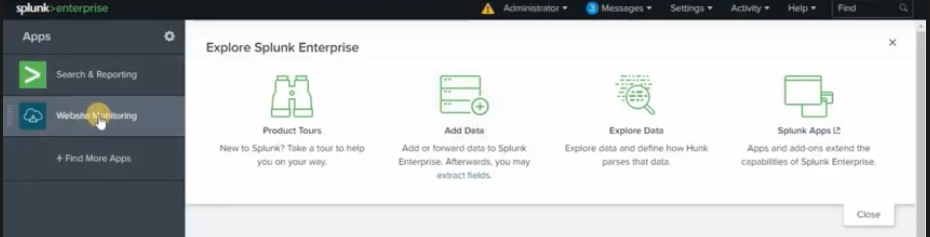
3) Once the website monitoring app is installed, you will be able to see the website monitoring app on the app panel.
SOC Analyst training with Infosec Train
SOC analyst training course is a customized training program developed by the experts at the Infosec Train. The course equips candidates with the necessary skills required to perform the complex tasks within a SOC team. It covers a large number of SOC analyst tools, including the tools mentioned above. All the current or aspiring L1, L2, L3 SOC analysts can take up this course and upskill their existing knowledge.
Infosec Train’s SOC Analyst training course

Contact Us


 1800-843-7890 (India)
